全自动获取节点/订阅方法
利用大佬wzdnzd的一站式代理抓取及聚合平台的这个项目在GitHubAction上实现节点自由
欢迎加入一休技术交流群讨论更多使用方法
https://yixiu520.com/p/jiedian/zidongjiedian/
使用流程如下
一、fork作者的代码仓库:GitHub - wzdnzd/aggregator: 自动签到、自动注册、订阅聚合及爬取脚本等

二、启用Actions,如下图:

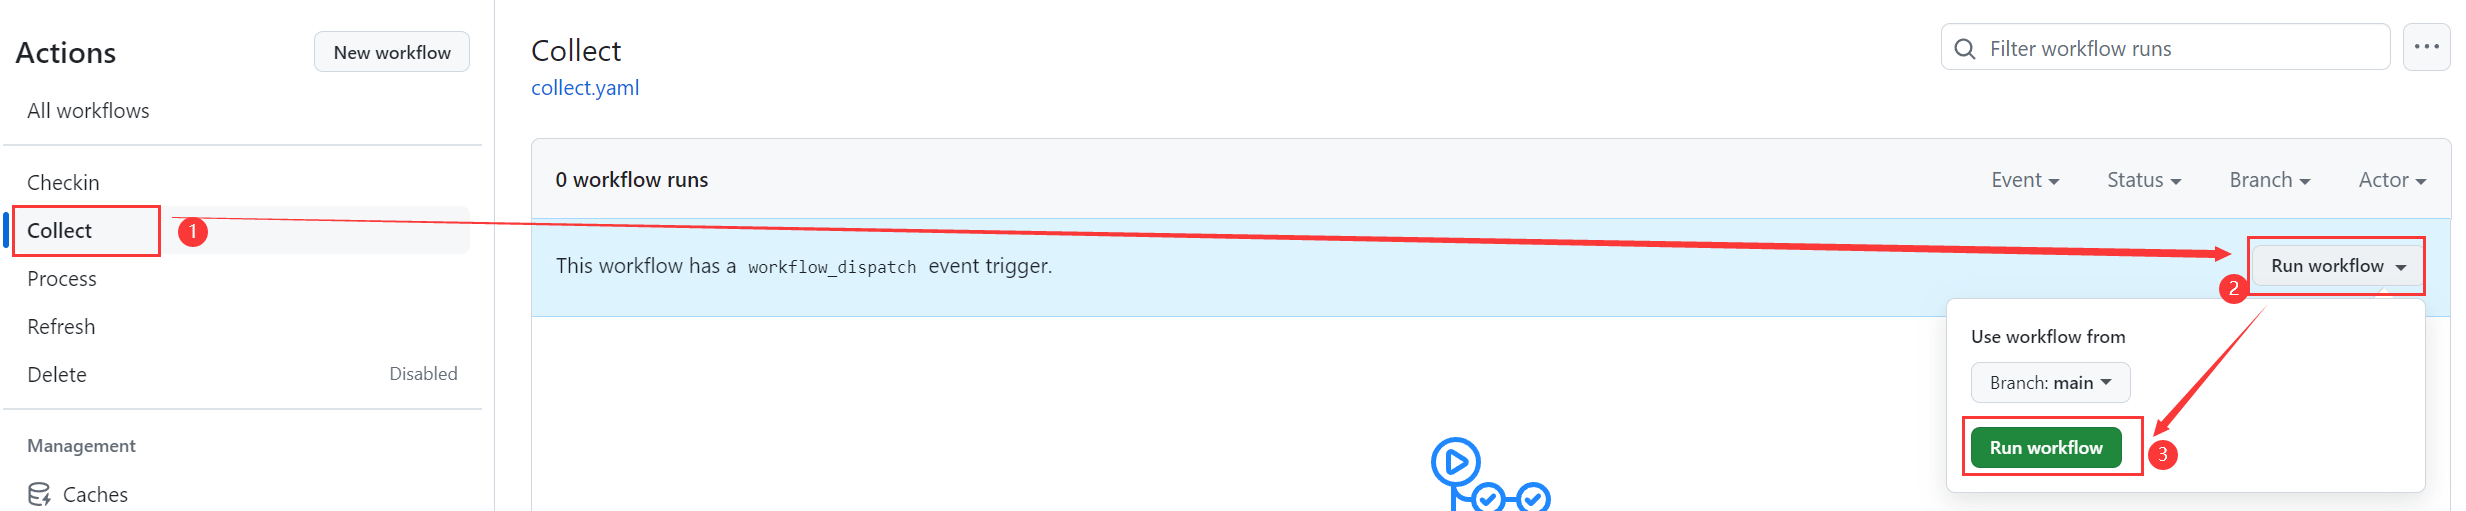
三、开启必要的workflow,比如Collect,Refresh和Checkin,具体操作如下图:

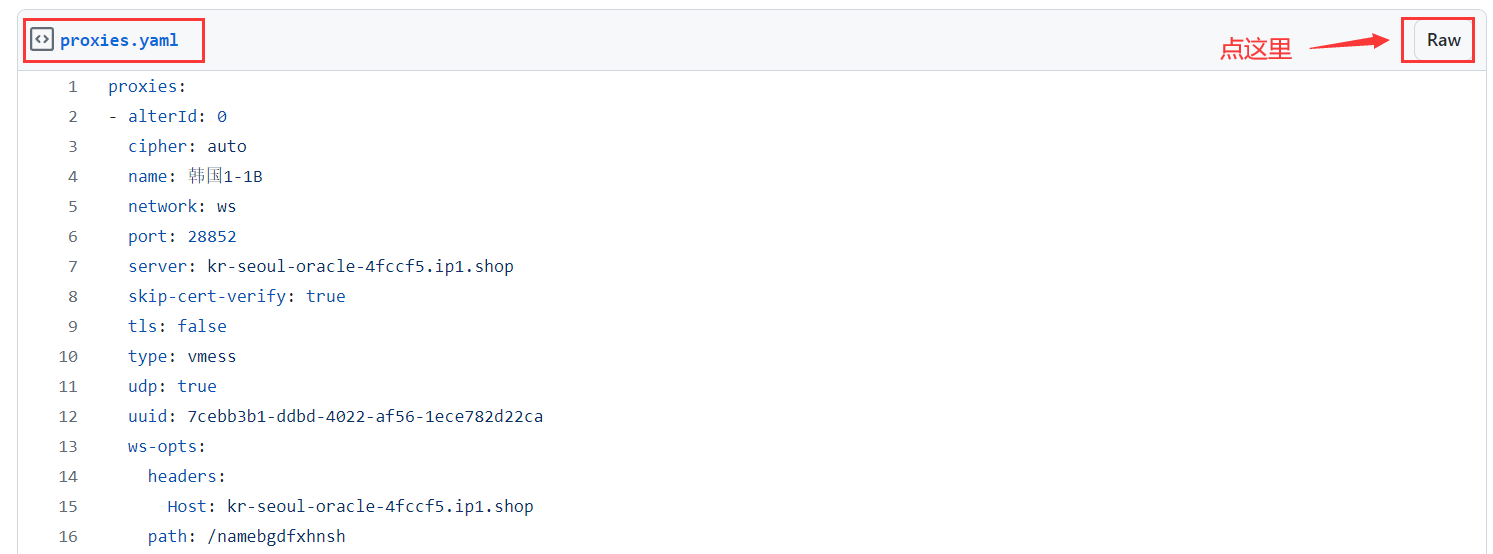
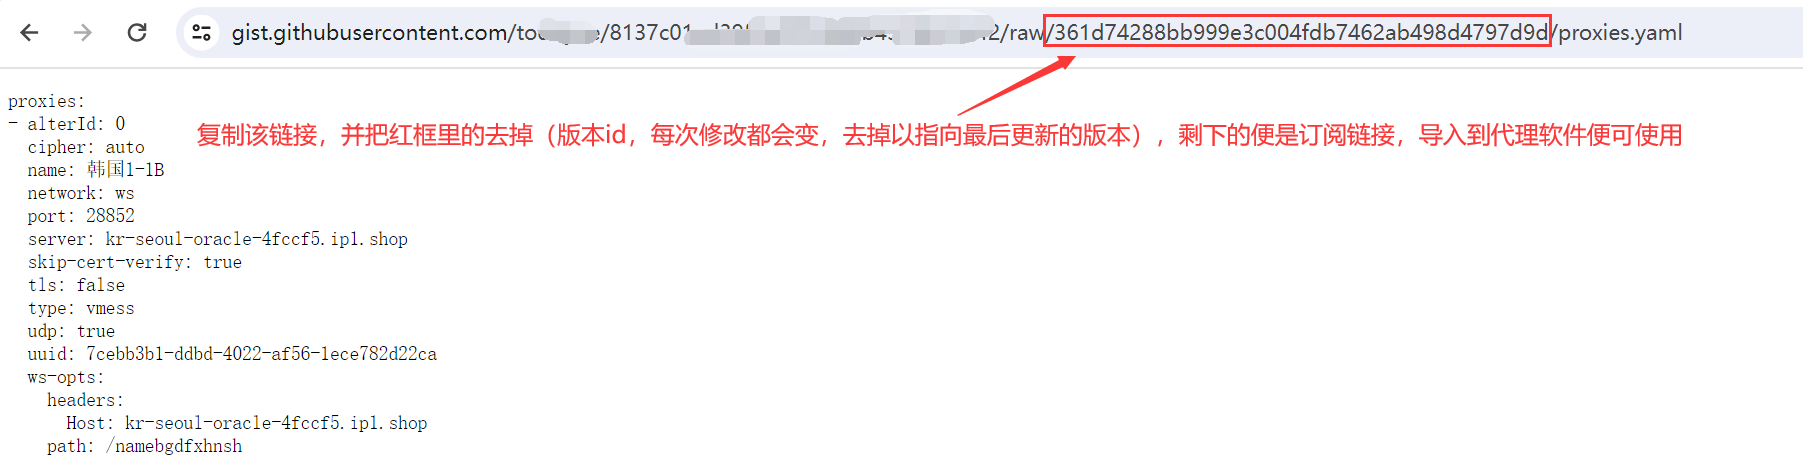
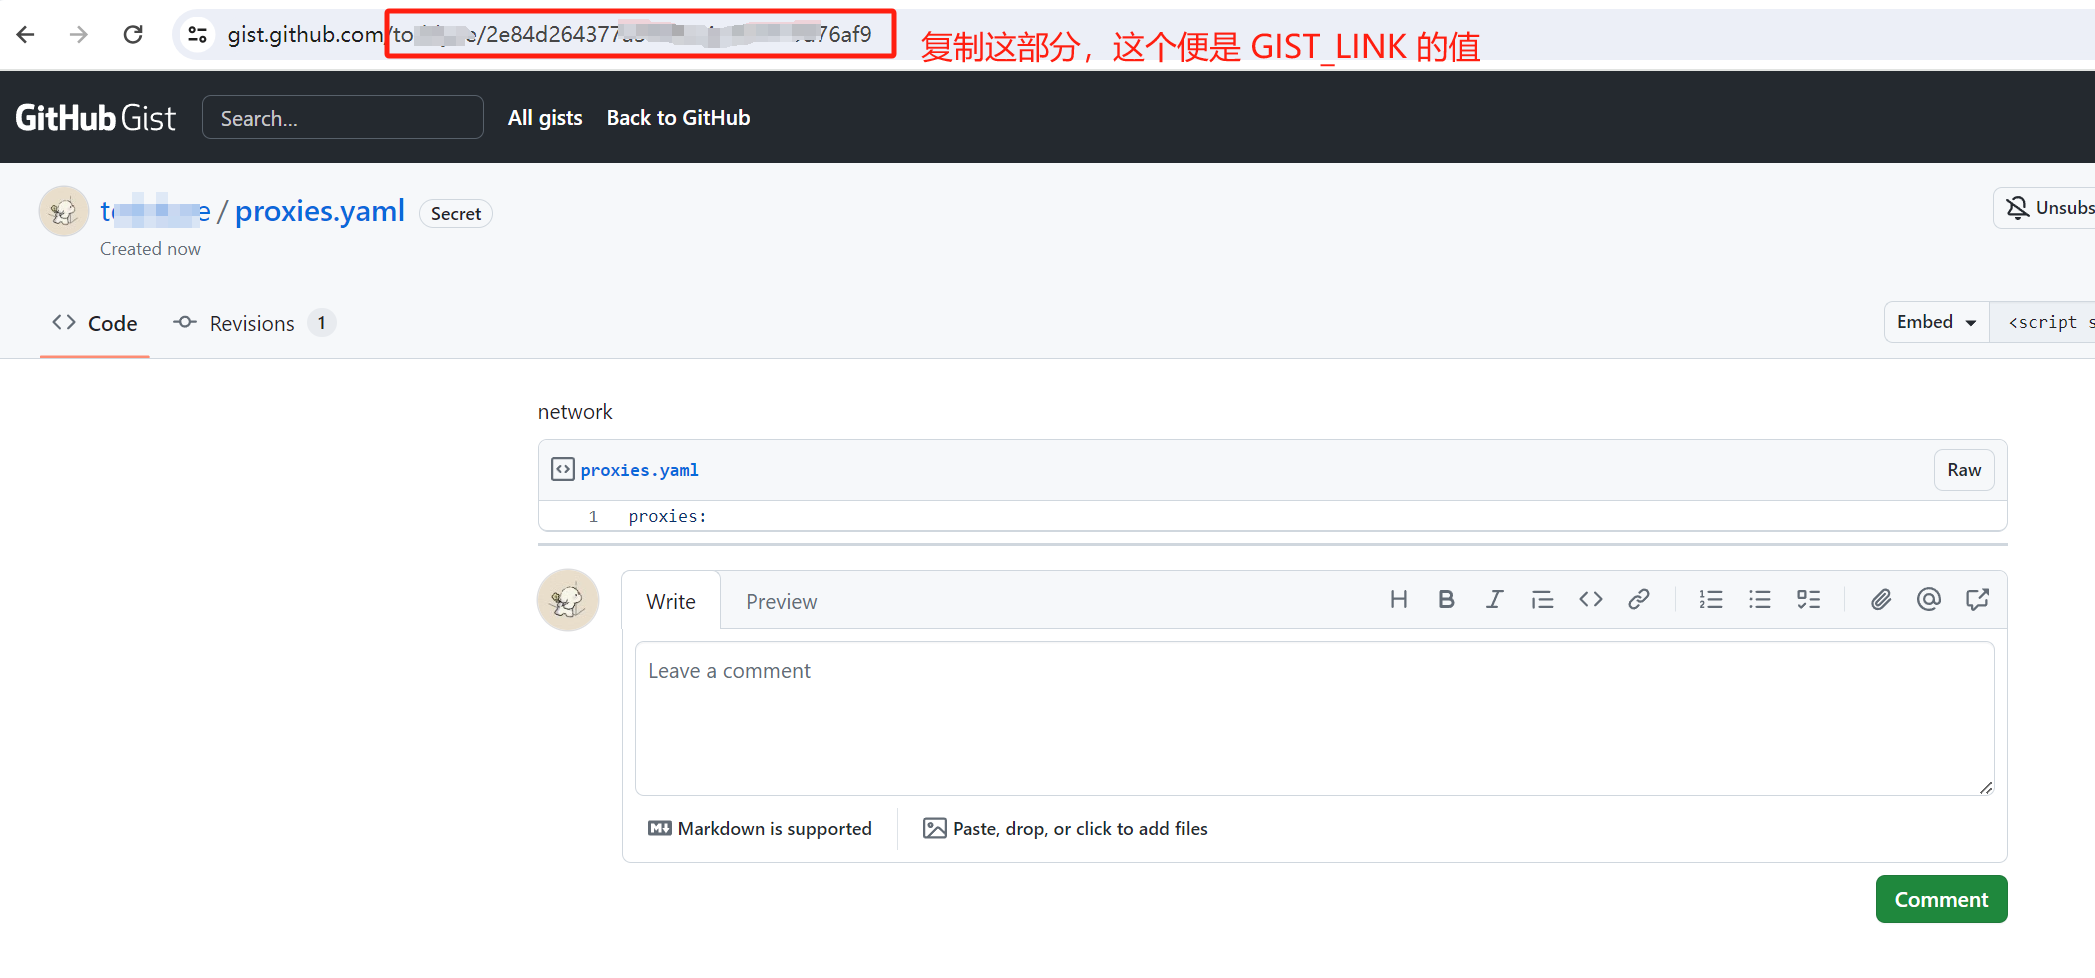
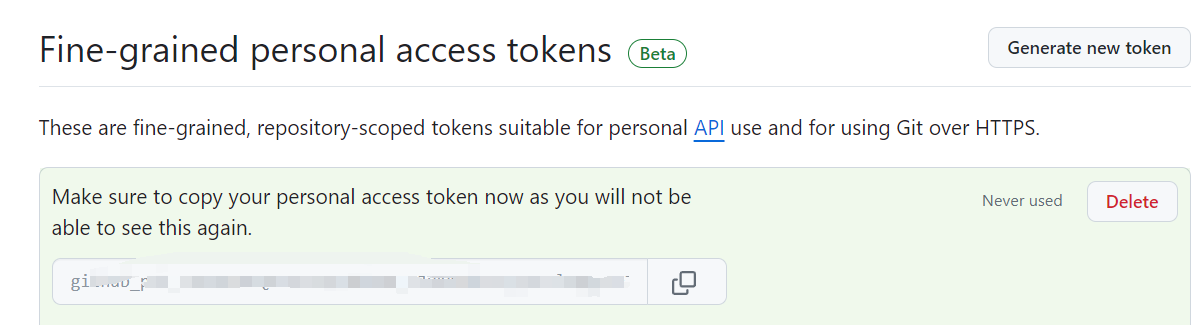
四、创建gist并获取到username/gist_id(记得保存,稍后要用),打开 https://gist.github.com ,随便创建一个,内容随便填,如图所示


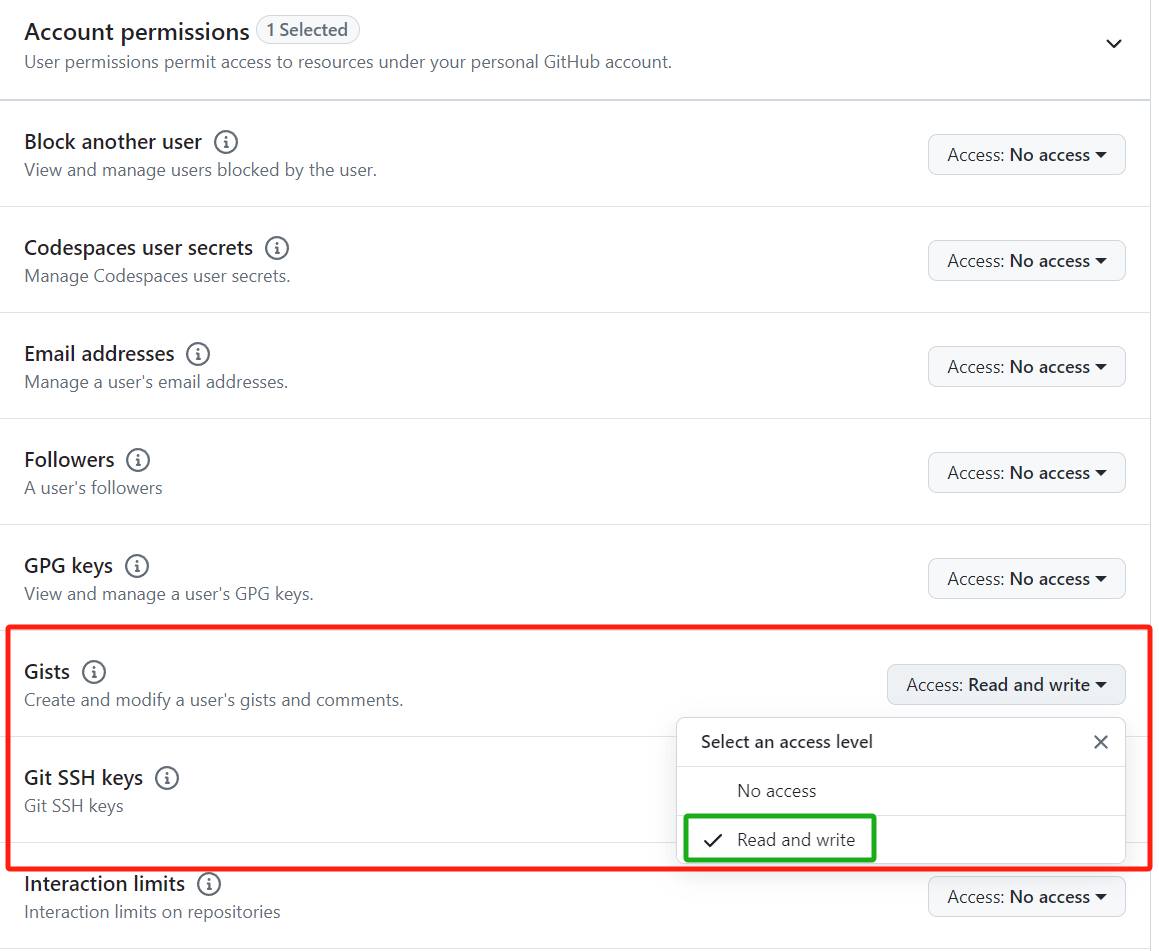
五、回到 Sign in to GitHub · GitHub 点击Generate new token按钮创建 PAT。名字随便填,过期时间选得久一点,重要的是在Account permissions里授予Gists的读写权限,创建好后复制生成的token稍后用


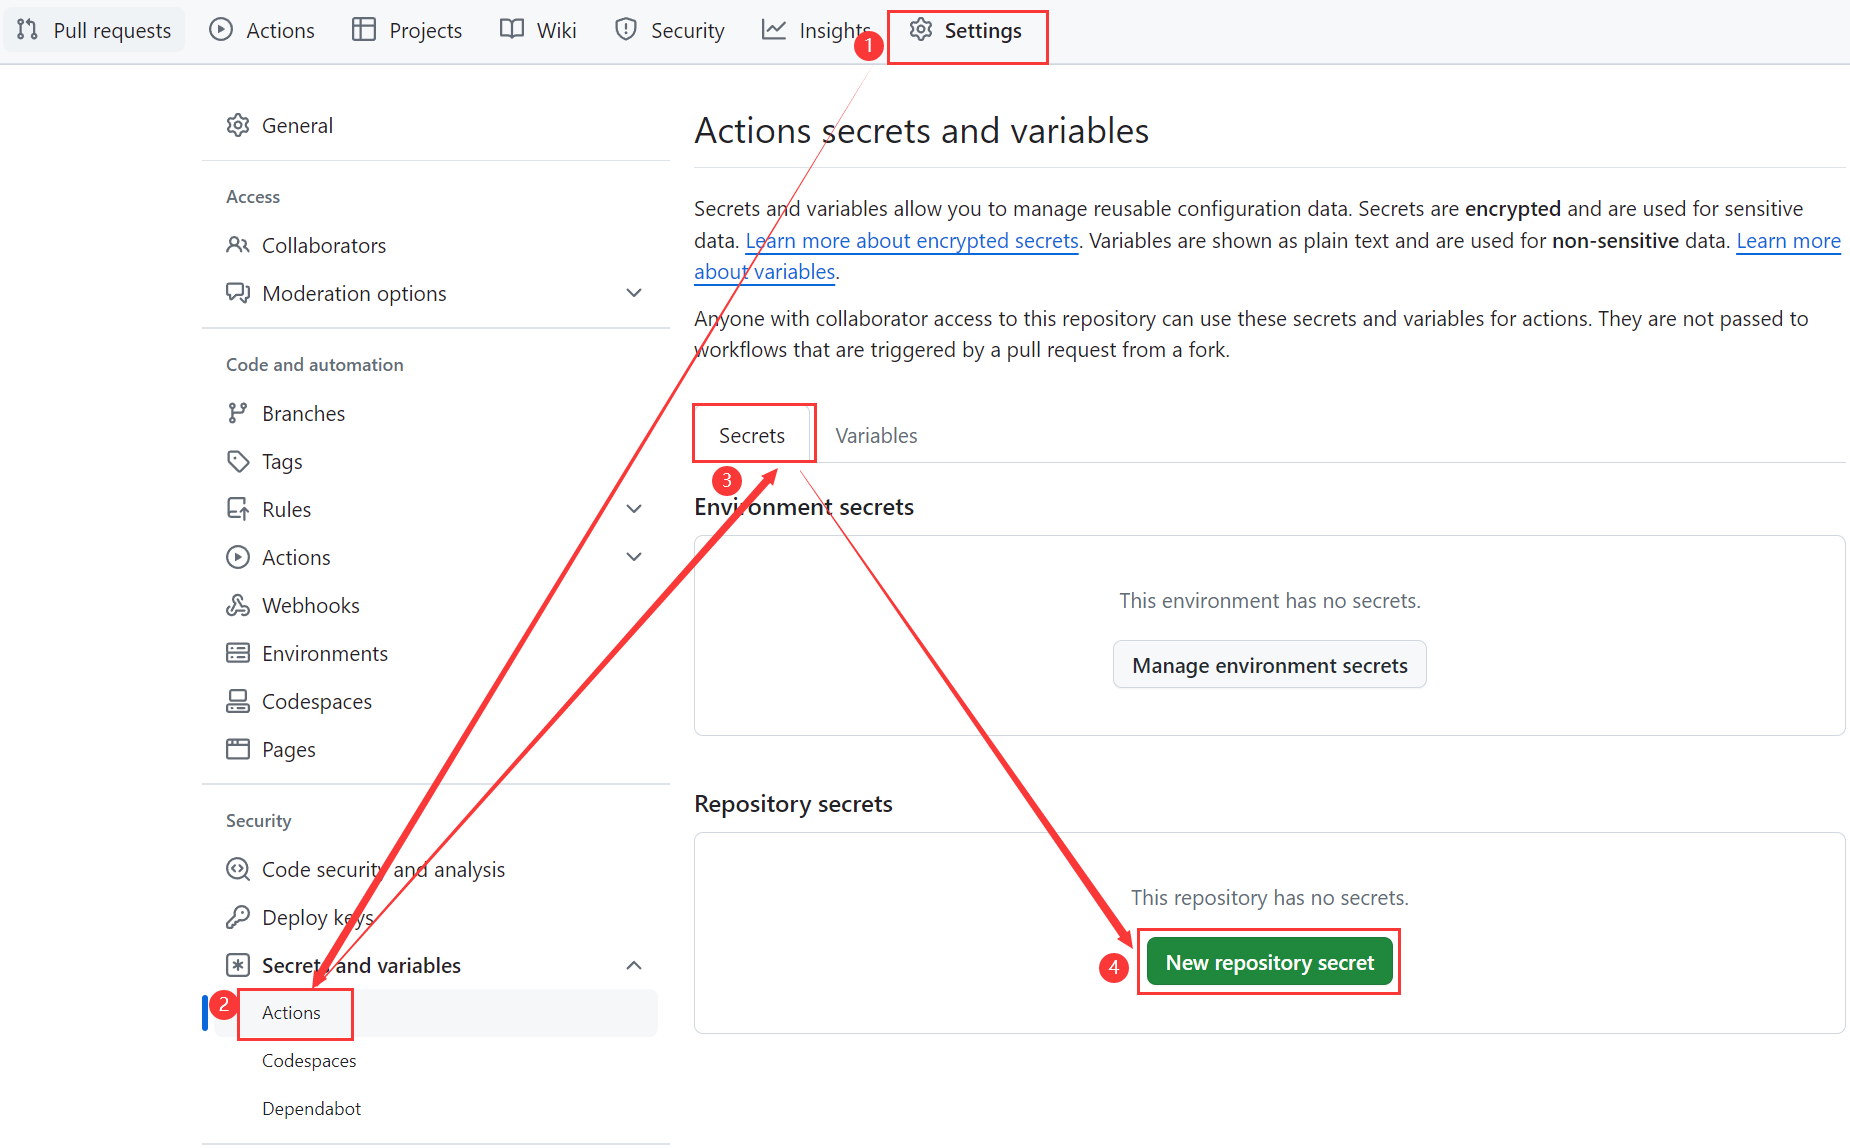
六、到仓库页面的Settings里设置环境变量
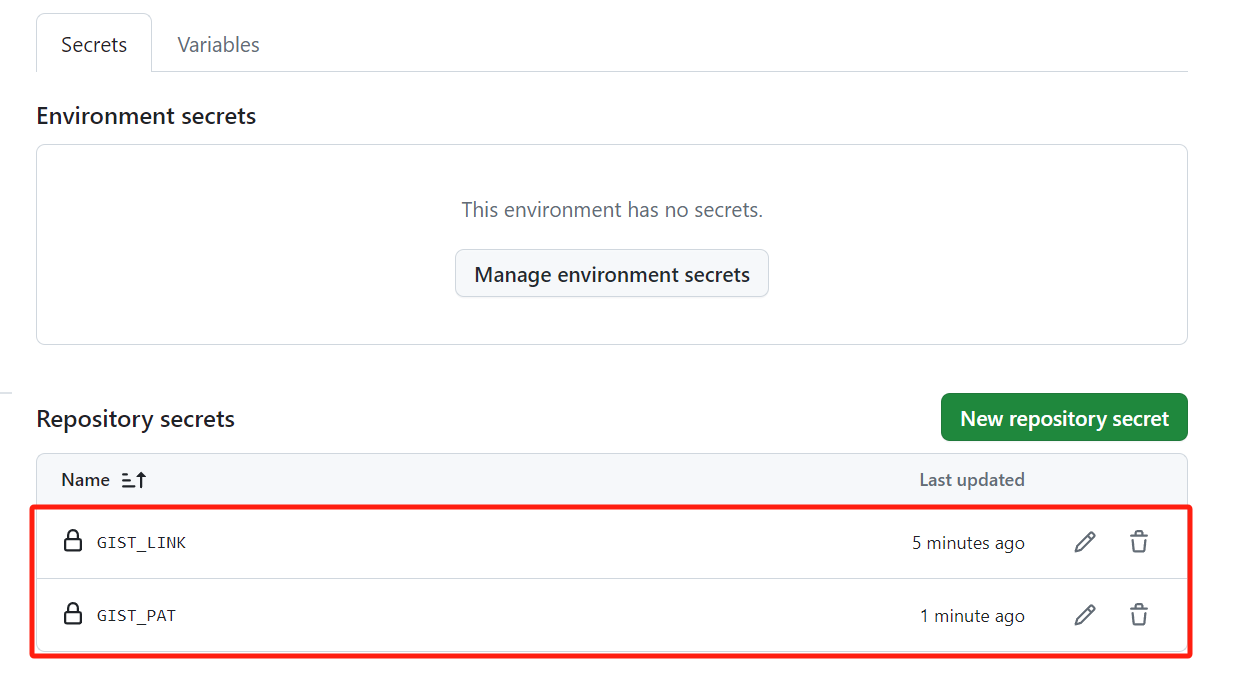
变量名为GIST_LINK GIST_PAT,值分别为第4和5两步获取到的内容

七、手动运行测试是否能够正常执行并成功推送到gist

八、添加订阅到你的翻墙软件里,添加不了的可以先订阅转换一下


如果你也在用,可以去给项目作者点个star,更新挺频繁,也很贴心
启用Action后如果中途你不想搞了,一定要禁用workflow或Action,
因为默认每两小时自动执行一次
全自动获取免费机场节点教程
https://github.com/wzdnzd/aggregator
自动爬取网络上分享的订阅地址及代理节点,自动注册/续期、订阅转换、节点存活检查等
一键安装 Conda
# 下载 Miniconda 安装脚本
wget https://repo.anaconda.com/miniconda/Miniconda3-latest-Linux-x86_64.sh -O ~/miniconda.sh
# 添加执行权限
chmod +x ~/miniconda.sh
# 安装 Miniconda(静默模式,自动添加到 PATH) ~/miniconda.sh -b -p $HOME/miniconda
# 将 Conda 添加到当前环境变量 echo 'export PATH="$HOME/miniconda/bin:$PATH"' >> ~/.bashrc source ~/.bashrc
# 初始化 Conda conda init
使用方法
准备好 Python3.9 环境
下载项目代码:
git clone https://github.com/wzdnzd/aggregator.git安装依赖:
pip3 install pyYAML tqdm geoip2 pycryptodomex运行代码:终端进入项目的
aggregate目录下执行命令python -u subscribe/collect.py -s
等待运行结束,最终会得到 3 个文件:
/root/aggregator/data/clash.yaml', '/root/aggregator/data/v2ray.txt', '/root/aggregator/data/singbox.json
流程如下:
fork作者的代码仓库:https://github.com/wzdnzd/aggregator
启用Actions,如下图:

- 禁用不必要的workflow,比如Checkin和Process,具体操作如下:

- 创建gist并获取到username/gist_id(记得保存,稍后要用),打开 https://gist.github.com,随便创建一个,内容随便填,如图所示
- 回到 https://github.com/settings/tokens?type=beta 点击Generate new token按钮创建 PAT。名字随便填,过期时间选得久一点,重要的是在Account permissions里授予Gists的读写权限,创建好后复制生成的token稍后用
- 到仓库页面的Settings里设置环境变量,变量名为GIST_LINK和GIST_PAT,值分别为第4和5两步获取到的内容
- 手动运行测试是否能够正常执行并成功推送到gist
如果你看到类似以下内容,说明你跑成功了(也可以到刚刚新建的gist里查看内容)
- 添加订阅到你的翻墙软件里,添加不了的可以先订阅转换一下